Back-Rolling After Airless Spraying: When and Why It Matters
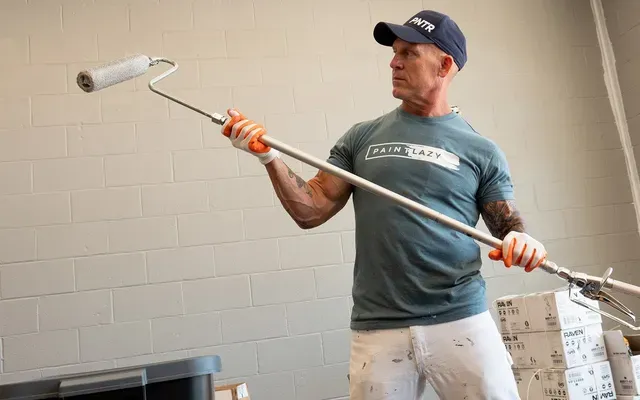
Airless spraying puts paint on a surface fast and evenly, but speed is not the same as adhesion. Back-rolling is the deliberate follow-up step: running a dry or nearly dry roller over the freshly sprayed film to redistribute it and press it into the substrate, rather than adding more material. Dulux Trade's technical guidance describes it as dry-rolling a freshly sprayed wall or ceiling with a short-to-medium nap synthetic roller immediately after spraying, while the coating is still wet. It's a manipulation step, not a second coat.
Why back-rolling matters
Spraying alone doesn't guarantee penetration. An airless gun can bridge small gaps, hairline cracks, and pinholes with a skin of paint rather than filling them — and that skin tends to crack and separate as the substrate moves with temperature and humidity. Working the wet film with a roller forces paint into those voids and into the texture of the surface itself, which is why manufacturer guidance links back-rolling directly to maximum adhesion between coats and to the substrate.
There's also a cosmetic reason. The slight, uniform stipple a roller leaves scatters light more evenly than a glass-smooth sprayed film, which helps hide minor flatness variations and surface blemishes that survived prep. Industry trainers note that even a technically perfect spray pass is often back-rolled anyway, simply to guarantee an even film build and a consistent, attractive finish.
On new plasterboard specifically, back-rolling does a third job: it flattens the raised paper nap or fibers that sanding set-joints can leave standing proud. That's one reason plasterboard manufacturers have recommended the practice since spray application became common on jobsites.
When to back-roll
- Primer on new drywall or plasterboard is the textbook case — porous paper facing, exposed joint compound, and fresh mud all benefit from paint being worked in rather than laid on top.
- Porous or textured substrates generally: stucco, raw drywall, concrete block, and rough masonry are routinely called out as needing back-rolling because their open texture absorbs paint unevenly under spray alone.
- Rough-sawn or porous exterior wood, such as rough-cut cedar siding, where open grain needs paint worked into it rather than sitting on the surface.
- Interior production painting on new-build walls and ceilings, where spray-and-backroll is treated as a standard two-person workflow: one person sprays a uniform coat, the second lays it off with a roller before it sets.
When to skip it
Not every surface gains from rolling. Metal and other non-porous substrates have nothing to "key into," and rolling a smooth sprayed finish can actively ruin it — if the goal is a glassy, automotive-style finish on a door or trim piece, back-rolling defeats the purpose. Smooth, pre-primed siding is another case where the extra step adds texture nobody asked for rather than improving durability.
Timing and technique
Back-rolling only works within the paint's open time — the window before it starts to skin over. Wait too long and you're not working the film in anymore; you're dry-rolling, which pulls material back off the surface instead of pressing it in. The roller pass itself should be a single, controlled lay-off stroke, not a loading pass — the cover should carry little to no extra paint of its own; its job is contact, not application.
None of that forgiveness works if the spray coat underneath is already uneven. Pressure that's too low produces a ragged pattern; pressure that's too high throws excessive overspray and accelerates tip wear — worth checking against our guide to recognising tip wear. Holding the gun at a consistent 10–12 inch distance and overlapping each pass by roughly 50% keeps film thickness even, so the roller has a uniform base to work rather than ridges and thin spots. Choosing the right tip for the substrate helps here too: a fine finish tip for smooth interior walls, a standard tip for general drywall primer, or a heavy-duty tip for block and masonry, all available as part of GROG's five reversible tip families — see the tip and filter matching guide for pairing tips with coatings.
Clean, consistent material delivery matters just as much as nozzle choice. A clogged or partially blocked filter changes pattern and flow mid-job, which shows up as unevenness the roller then has to compensate for. GROG's three-stage filtration — a coarse suction filter ahead of the pump, a fine pump/manifold filter after it, and a gun filter in 60 or 100 mesh — is built to catch debris at each stage before it reaches the tip; our filters explained guide covers how to match mesh size to coating. Reliable hose and gun pressure ratings also matter when running at the higher pressures some texture or masonry coatings demand — GROG hoses are rated to 227 bar and guns to 270 bar, giving headroom before back-rolling even becomes a question.
Roller nap should match the surface: finer naps suit smooth interior walls, heavier naps handle porous masonry and rough wood without starving the film. Matching nap, tip, and filtration to the substrate is what makes back-rolling a quick, single-pass finishing step rather than a fight to fix an uneven spray coat.