Airless Sprayer Maintenance Checklist – Daily, Weekly and Long-Term Care
An airless sprayer is a precision pump working against thousands of PSI, day after day. The difference between a machine that lasts a decade and one that fails on a Friday afternoon is rarely the brand on the housing — it is maintenance. The good news is that airless maintenance is fast, repeatable and largely the same whether you run a compact filler unit or a facade machine. This checklist breaks the routine down into daily, weekly and long-term tasks, with clear steps for cleaning after paint, primer and filler, and a troubleshooting table for the days something is not right.
Everything below applies to modern electric and petrol airless units, including the GROG range. Use it as a working reference: skim the table of contents, jump to the section you need, and keep the checklist near the machine. Where a specific GROG model is a sensible fit for a task, it is linked — but the routine itself is universal.
Why airless maintenance pays off
High-pressure fluid sections live or die by clean seals and clear passages. Dried material is abrasive, it scores the piston and packings, and it clogs the tiny orifices that shape the fan. Skipping a clean-out does not cause an obvious failure the same day — it shortens the life of every wearing part quietly, until priming gets harder, pressure starts to pulse, and the finish suffers.
- Consistent spray pattern: clean tips and filters keep a full, even fan instead of tails and spitting.
- Longer seal life: flushing and lubrication stop packings from drying, cracking and leaking.
- Reliable priming: a clean inlet valve draws material first time instead of stalling on air.
- Lower running costs: tips, filters and seals last longer, and you avoid emergency pump rebuilds.
- Better resale and uptime: a well-kept machine holds value and is ready the moment the next job starts.
Safety first: relieve pressure before any maintenance
Airless equipment atomises paint by forcing it through a tiny orifice at very high pressure. A leak or a triggered gun can inject fluid straight through skin — an injection injury looks minor but is a genuine surgical emergency that needs immediate medical attention. Never point the gun at any part of your body, never put a finger over the tip, and never disassemble a machine that is still under pressure.
Run the pressure-relief procedure before cleaning, before clearing a clog, and before removing any filter, tip or hose:
- Switch the machine off and turn the pressure control to its lowest setting.
- Engage the trigger lock, then point the gun into a waste container and unlock and trigger it to release stored pressure.
- Turn the prime/drain valve to the prime (open) position to relieve pressure in the hose and pump.
- Only now remove the tip, open a filter housing or disconnect a hose. Re-engage the trigger lock whenever you set the gun down.
Daily maintenance: clean after every job
The single most important habit is a full flush at the end of every job, before the material has any chance to dry inside the pump, hose and gun. Match the cleaning fluid to the coating: water for water-based paints, plasters and fillers; the manufacturer's recommended solvent for solvent-based products. Most decorating and plastering work today is water-based, which keeps daily cleaning simple.
Cleaning after water-based paint
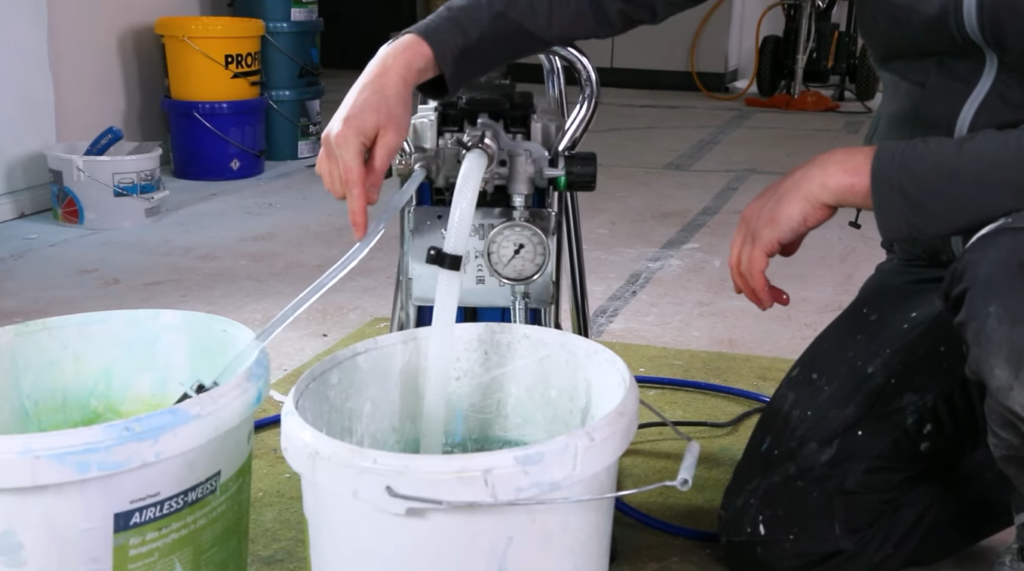
- Relieve pressure, then move the suction tube from the paint into a bucket of clean water.
- Set the prime valve to prime and run the pump to push paint back out of the suction side; switch to spray and trigger the gun into the waste container until water runs through.
- Raise the pressure a little and flush clean water through the gun until it runs clear, then run the tip in reverse briefly to clear the orifice.
- Remove the tip and tip filter (and the gun filter) and rinse them; wipe down the gun, hose fitting and machine.
- Relieve pressure a final time and, for storage, follow the pump-preservation step below.
Cleaning after primer
Primers and undercoats are often heavier and more pigmented than topcoats, so they settle and dry faster. Flush a little longer than you would after a thin emulsion, and pay attention to the filters — primer is where you will first see a filter clog.
- Flush until the water runs completely clear, not just tinted — pigment left in the pump dries into grit.
- Remove and clean the inlet strainer as well as the gun and tip filters; primer settles on the suction side.
- If you switch from a solvent-based primer to water-based paint (or vice versa) on the same day, flush thoroughly with the correct fluid in between.
Cleaning after filler and plaster
Fillers, fine surface plasters and putties are abrasive and heavy — they are the hardest materials on a pump and the least forgiving if left to set. Machines built for this work, such as the GROG F4L and GROG F5, still depend on an immediate, thorough clean. For the full application routine see the guide on spraying plaster with an airless machine.
- Flush immediately — do not stop for a break first. Set material can seize a pump within an hour.
- Use plenty of clean water and keep flushing until it runs clear; abrasive slurry needs more volume than paint.
- Remove and clean the inlet/foot valve and all filters by hand — filler collects in every strainer.
- Check the tip for wear afterwards: abrasive materials widen tip orifices faster than paint does.
Weekly maintenance
Set aside a few minutes at the end of the working week for the parts a daily flush does not reach:
- Remove and deep-clean the gun filter and inlet strainer; replace any that are torn or deformed.
- Inspect the spray tip for wear — a worn orifice sprays a narrower fan, uses more material and finishes poorly.
- Check the high-pressure hose along its length for kinks, bulges, abrasion or cracking; a damaged hose is a safety risk.
- Add a few drops of throat seal oil (TSL) to the piston rod so the packings stay lubricated between jobs.
- Wipe the whole machine down and check that fittings, the prime valve and the gun swivel are tight and leak-free.
Monthly and long-term maintenance
Once a month, or before a large or demanding job, go deeper into the fluid section and moving parts:
- Clean or replace the pump/manifold filter and inspect the inlet and outlet check valves and balls for wear or debris.
- Inspect the throat packings for leaks; weeping around the pump rod means the packings are drying or worn.
- Check the intake (foot) valve seats — pitting or a stuck ball is a common cause of priming problems.
- Keep a service kit on hand for the packings and valves; fitting a service kit restores pressure far more cheaply than a new fluid section. Consumables are in spare parts.
- Review your tip inventory and retire worn tips so every job starts with a correctly sized, sharp orifice.
Filter maintenance
A typical airless system filters material in up to four places, and each one matters. Keeping them clean is the cheapest way to protect spray quality and pump life:
- Inlet / foot-valve strainer: the coarse screen on the suction tube that stops debris entering the pump. Clean after abrasive materials and weekly otherwise.
- Pump / manifold filter: the main in-line filter between pump and hose. Clean monthly and match the mesh to the material — coarser for filler, finer for fine finishes.
- Gun filter: protects the tip from partial clogs. Clean after each job; a blocked gun filter feels like low pressure at the gun.
- Tip filter: the last line of defence right behind the tip. Rinse it whenever you remove the tip.
Use the correct mesh for the coating and replace any filter that is torn, collapsed or permanently discoloured. Replacement mesh and gaskets are listed under spare parts.
Tip and spray-gun maintenance
The tip shapes the fan and meters the flow, so a worn or clogged tip shows up immediately in the finish. Reversible ("reverse-a-clean") tips make clog clearing safe and fast:
- Clear a clog by rotating the tip to the reverse position and triggering into a waste container — never poke the orifice with wire or a needle, which damages the carbide and ruins the fan.
- Replace worn tips: as an orifice wears it grows, which increases output, widens overspray and lengthens the fan until the pattern breaks up.
- Match tip size to the material — a fine tip for lacquers and enamels, a larger tip for wall paint, filler and heavy coatings. See the guide on choosing the right tip.
- Keep the tip seal and its retainer clean; a damaged seal leaks at the gun head. Clean the gun needle and seat when trigger response gets sticky.
Pump preservation and winter storage
Water left in a fluid section is the enemy of a stored pump: it lets seals dry out, invites corrosion, and — below freezing — expands as ice and can crack the pump housing. After the final water flush, pump a purpose-made pump protector (storage/conservation fluid) through the system so the seals stay wet and protected:
- Flush the machine clean with water as usual and relieve the pressure.
- Draw pump protector up the suction tube and cycle it through the pump, hose and gun until it appears at the tip.
- Leave the fluid section filled with protector, relieve pressure and engage the trigger lock.
Always preserve the pump before storing the machine for more than a few days, and always before any risk of frost — plain water in a pump over a cold night is one of the most common ways a healthy machine is destroyed.
Storage recommendations
- Store the machine clean, depressurised and with the fluid section filled with pump protector.
- Keep it dry and frost-free; avoid unheated vans and sheds over winter unless the pump is preserved.
- Coil the high-pressure hose loosely without tight kinks, and store the gun with the trigger lock engaged.
- Protect the tip and store spare tips in their guards so the orifices are not knocked or blocked.
- On the next start-up, flush the protector out with clean water (or the correct solvent) before spraying material.
Common maintenance mistakes to avoid
- Not relieving pressure before service — the cause of most injection injuries and messy filter changes.
- Leaving material to dry in the pump "until tomorrow" — set filler or paint means a strip-down, not a rinse.
- Cleaning with the wrong fluid — water on a solvent-based coating (or vice versa) will not dissolve the material.
- Poking a blocked tip with metal — reverse the tip instead; wire destroys the carbide orifice.
- Storing with plain water over winter — freezing water cracks pumps and splits valves.
- Ignoring filters until pressure drops — by then the clog is already stressing the pump.
- Running a worn tip to "get more life" — it wastes material and hides a fault that a cheap tip would fix.
Troubleshooting common problems
Most day-to-day faults trace back to a clog, a worn seal or a filter — the same parts this checklist keeps clean. Work from the simplest cause first, and always relieve pressure before opening anything.
| Symptom | Likely cause | What to do |
|---|---|---|
| Sprayer will not prime or draw material | Clogged inlet strainer, dried material in the pump, stuck inlet ball, air leak on the suction side | Clean the inlet filter and foot valve, cycle the prime valve, free and lubricate a stuck ball, and check the suction connection is tight |
| Pressure fluctuates or pulses | Clogged filter, worn packings or check balls, low material level | Clean or replace the filters, top up the material; if it persists, fit a packing / service kit |
| Spitting or "tails" at the ends of the fan | Pressure too low, worn tip, partial clog | Raise the pressure to spec, reverse the tip to clear it, and replace a worn tip |
| Paint leaks from the spray gun head | Worn tip seal, worn needle or seat | Replace the tip seal; if it continues, service the gun needle and seat |
| Motor runs but no pressure builds | Prime valve left open, worn pump seals, empty pump | Close the prime valve and re-prime; if seals are worn, rebuild the fluid section |
| Fluid weeps around the pump rod | Worn or dry throat packings | Add throat seal oil daily; replace the packings when leaking continues |
Complete maintenance checklist
Keep this near the machine as a quick reference. Frequencies are a baseline — abrasive fillers and heavy daily use call for the shorter intervals.
| Task | Frequency |
|---|---|
| Relieve pressure and engage the trigger lock | Before every service, after every use |
| Flush the machine until the fluid runs clear | After every job |
| Clean the gun, tip and tip filter | After every job |
| Add throat seal oil to the pump rod | Daily |
| Clean the inlet strainer and gun filter | Weekly (daily with filler / plaster) |
| Inspect the tip for wear and the hose for damage | Weekly |
| Clean the pump / manifold filter and check valves | Monthly |
| Inspect throat packings and check for leaks | Monthly / before big jobs |
| Flush pump protector through the fluid section | Before storage over a few days and before frost |
| Replace worn tips, filters and seals | As needed |
Frequently asked questions
How often should I clean my airless sprayer?
After every job, without exception. A full flush until the fluid runs clear, plus a quick tip and filter clean, is the daily minimum. Weekly and monthly tasks then cover the parts a flush cannot reach.
Can I leave paint in the sprayer overnight?
It is best to flush. For water-based paint a short overnight pause is possible if you relieve pressure and stop the tip and pump from drying, but never leave filler, plaster or solvent-based material sitting, and never leave plain water in the pump when frost is possible.
Should I clean with water or solvent?
Match the cleaning fluid to the coating: water for water-based paints, plasters and fillers; the manufacturer's recommended solvent for solvent-based products. Most modern decorating and plastering materials are water-based.
What is pump protector and do I really need it?
Pump protector (storage or conservation fluid) keeps the seals wet, prevents corrosion and stops water freezing inside the pump. Use it before any storage of more than a few days and always before frost — it is far cheaper than a cracked pump or a seal rebuild.
How do I know when a spray tip is worn?
A worn tip sprays a narrower fan, pushes out more material at the same pressure, increases overspray and gives a patchier finish. If you are raising pressure to hold the pattern together, the tip is due for replacement.
Conclusion
Airless maintenance is not complicated — it is consistent. Relieve pressure, flush after every job, keep the filters and tip clean, lubricate the packings, and preserve the pump before storage. Those few habits prevent the large majority of breakdowns and keep the finish sharp from the first job to the last.
Choose the machine to match the work and the same routine keeps it running: the GROG F4L and GROG F5 for filler and plaster, the GROG AZ600 and GROG AZ700 for paint and facade work, and the GROG GR-A9 PLUS where there is no mains power. Browse the full range in the catalog, keep service kits and spare parts on the shelf, and if you are unsure which parts your model needs, contact our team. For a broader look at machine care, see keeping your airless sprayer in top condition.